
|
As having a few days left in school as a Sophomore, my experiences with this class of DDA II has been great to say. The course included six different special units, and some of them were easy to learn and conquer. Considering the main takeaways of this class, I would say it is about knowing how to render our final pieces of work. It is a very crucial key to be the success after many hours and minutes of hardworking. You must be able to learn and know which type of render is necessary for your modeling project. The result is what the teacher wants and to expect how much have your modeling skills have improved. During the four quarters of the period, some assignments were easy, and some of them were more challenging to subdue. Therefore, the grade book of mine is punched in by a few zeros. My grade went down a bit sometimes. In the end though, I was able to learn and understood more about the previous unit subjects, and went back to do them and eventually turning them in, scoring a better grade. However on the final late fourth quarter, there were a few rewarding experiences that I both encountered and enjoyed. One big time to relieve my low grade was when the exams practice review came out. We were expected to make many attempts to try and prepare ourselves for the final exam. After turning them all in with a highest grade I could get in each one of them, it was altering the knowledge of mine and remembering the previous unit subjects we went over not long ago. The biggest rewarding experience that I think was the most successful, was turning in my 15 seconds long animation project. It was something very fun to do, but also as the final work for the quarter, it saved my low grade. The astonishing final renders of my animation made me proud of my production process. That is the most memorable part of my work. The great skill I learned in this class was the good use of patience. When it came to harder assignments to deal with, it usually will take up a big while if going for the best final result. I intend to use this technique, as it help reduce the stress and giving it more time to process and work its way through. But with most of the work done, working in this class helped gain a lot of knowledge in the practice of 3d modeling, much better than last year, and many improvements had been established. My views are positive for this period. 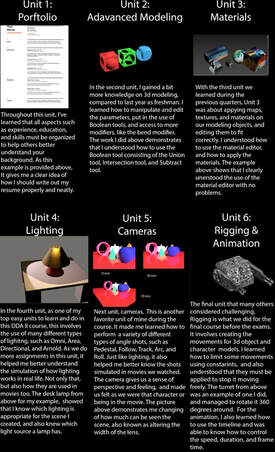 Overall Summary:
0 Comments
My grade improved from the amount of work I did during this quarter, compared to the previous second quarter. The more modeling assignments I did, the more experience I gained from using the software. Each work's grade rose higher. I missed some of them, due to lack of knowledge or due to short amount of time. Eventually I went back and fixed the missing grades by reading the instructions carefully and turning them in. More knowledge had been unlocked to new controls and secret features of the modeling software. Yes, I've said this once or more in the last blog, but this is the one thing that made me felt more better than the last time. the modeling becomes a little bit easier as I work each time, so therefore the progress is steadily increasing.
Overall Summary;
Well, since the quarter is about to end, I would like to overall say what I think about rigging. Rigging first of all is when you're making your model to move. Of course, as other students suggest, it is the most difficult topic in Digital gaming design, mainly because they are much more complex than any other objects, such as Camera, Lighting, and Parametric modeling. More to do, such as skinning, creating a CAT character, and using hierarchy to link objects together so that they work properly and in order are the obstacles. My favorite part is what the possible result would be. Trial and error is very common, sometimes that our model will snap out of place and crash, making us to repeat there process again. In the end, rigging in't easy as we expected.
Overall Summary:
Link; conceptartempire.com/what-is-rigging/ Alright, this is it. As we are in the final quarter for 2019, we have gone through the lighting topic. It was about how the use and demonstration of different types of light sources, such as Omni light and Directional light, works in 3ds Max. A really big main reason to discuss about lighting in 3d modeling is because it helps to increase the realism of a scene's lighting effects. The most interesting part of my experience was the final rendering part. When you alter your rendering parameters, the result has a very pleasing look. Almost realistic as I observed, and that the lightings were very well done too. There were other light sources found in modeling software, such as targeted spot, free spot, area, and skylight. At the first start was a little confusing, since there were so many kinds of light to use, I decided to test out one by one, and began playing around with both the rendering settings and the lighting parameters. Once I've picked which one to use, I also must decide which path and angle it has to be set in and placed so that the lighting result is appropriate and accurate just like in real life. Beyond my expectations, I am looking for another time to work with this again. There are several many different ways of of how you can manipulate the change in settings with your lighting, and that is all up to you. The experience so far is enjoyable, but the only con that I have is getting the lightings to the right appropriation.
Overall summary;
It is now quarter three, and we've started off with rendering models in our assignments. I loved the practicing of applying different types of textures onto objects, which turns the modeling object into a realistic life-like feel. One new modifier we now use is something known as the UVW mapping. Simply in what it does, it manipulates how your mapped and materials result appears on the surface of your modeling object. How do you make this happen? In my experience, I moved and alter the Gizmo of the mapping. For me, what was really interesting about using the UVW modifier was really enjoyable and helpful. It made things easier and made me satisfied of my end results. The difficult part of this process is that you have to take your time inspecting close attention and detail to your mapping. Your alignments must be accurate and good in order to have a realistic render. There many options to how you would like to control your alignments in the UVW mapping's settings. Sometimes during my modeling assignments, there were issues with the correct layout of my bitmaps. A frustration frequently comes into my mind of how to deal with this kind of problem. Normally, the process would take a while getting it into place. This is why some of my friends finish their's faster than I, but over time it's good getting used to it. The UVM mapping is a really good and nifty part to deal with in this quarter so far, and I'm very impressed of what it does. For future references, I could use more practice of UVW mapping on more complex projects, such as a gas can or a soda can.
Overall Summary;
Recently, we've been playing around with simulations in 3ds Max during the second quarter in Digital Design and Animation II. Now, it was time to work on something a little more interesting, simulations. We used a new modifier, called Cloth, to simulate and define cloth and collision objects for our assignments. This so far is one of my favorite modifiers of all because of its effectiveness and realistic animation of the clothe. The fun part I enjoyed was certainly creating the flag, being creative to assign an appropriate picture to my plane, which makes it a flag. Eventually applying the strength of force, gravity, and wind, made it looked really good once it was waving. I simply used Standard Primitives to make a cylinder for the pole and a plane to be the flag of my creation. When making the flag, I went to object properties to edit and select my preset options to either apply the Cotton preset or the Silk preset. The most difficult part of the activity was that the amount of force has to be correctly applied, otherwise polygons will deformed the flag and will not turn out the way you will expect it. The errors can be reversed by going back and alter the force strength, that way the object will simulate correctly. But after all, it is still fun. You can use the cloth modifier to animate any other objects you would like to make, such as a tablecloth, pillow, napkin, blanket, or even a tent.
Overall Summary;
Source; knowledge.autodesk.com/support/3ds-max/learn-explore/caas/CloudHelp/cloudhelp/2017/ENU/3DSMax/files/GUID-1663898B-7C53-4123-9D54-7B7EE843FB92-htm.html Source 2; vrayschool.com/3ds-max-curtains-wind-simulation/ |
